
Hello, ladies.
I noticed with a
lot of joy that you have liked my last makeup, the cut crease ones, and I was
even happier when you have asked me to do a tutorial.
This makeup will
not be a full face one, because shooting steps took me some time and I was risking
losing the light for the final makeup of the eye pictures, but the important
thing is that I caught the essential. I hope you'll enjoy it and you'll
understand my explanations.
Am constatat cu bucurie ca v-au placut mult ultimele mele
machiaje, cele cut crease, si am fost si mai fericita cand m-ati rugat sa fac
un tutorial.
Machiajul nu va fi unul full face, pentru ca fotografierea
pasilor mi-a luat ceva timp si riscam sa pierd lumina pentru pozele cu
machiajul final al ochiului, dar important este ca am surprins esentialul. Eu
sper sa va placa si sa intelegeti explicatiile mele.

For this makeup,
I've used three Sleek palettes: Darks, Brights and Supreme. Also, you will need
a soft eyeliner, preferable a khol kajal one, to draw the line.
Let's begin the
tutorial:
Pentru acest machiaj am folosit trei palete Sleek: Darks,
Brights si Supreme. De asemenea, veti avea nevoie de un creion de ochi moale,
de preferat khol kajal, pentru a trasa linia.
Sa trecem la tutorial:
- I applied foundation, powder and primer. Then, with a brown khol kajal eyeliner, holding the eye open, I draw a line where, in my case, there should be the crease. Because my eyelids are hooded, the crease is not defined and that's why I have to make a fake one on every makeup. Also, I find it more easy to hold the eye open to draw the line and I'll recommend for you to do the same, no mather what your eye shape is, because that's how you'll know exactly where it's forming the crease that you'll have to "cut". / Am aplicat fond de ten, pudra si primer. Apoi, cu un creion khol kajal maro, tinand ochiul deschis, am trasat o linie acolo unde ar trebui sa existe la mine pliul pleoapei. Pentru ca pleoapele mele sunt cazute (hooded eyes), pliul nu este definit si de aceea trebuie sa-l “mimez” cam la fiecare machiaj. In plus, mi se pare mai usor sa tin ochiul deschis pentru a trasa linia si va recomand sa faceti la fel, indiferent de forma ochiului, pentru ca asa veti stii exact unde se formeaza pliul pe care trebuie sa-l “taiati”.


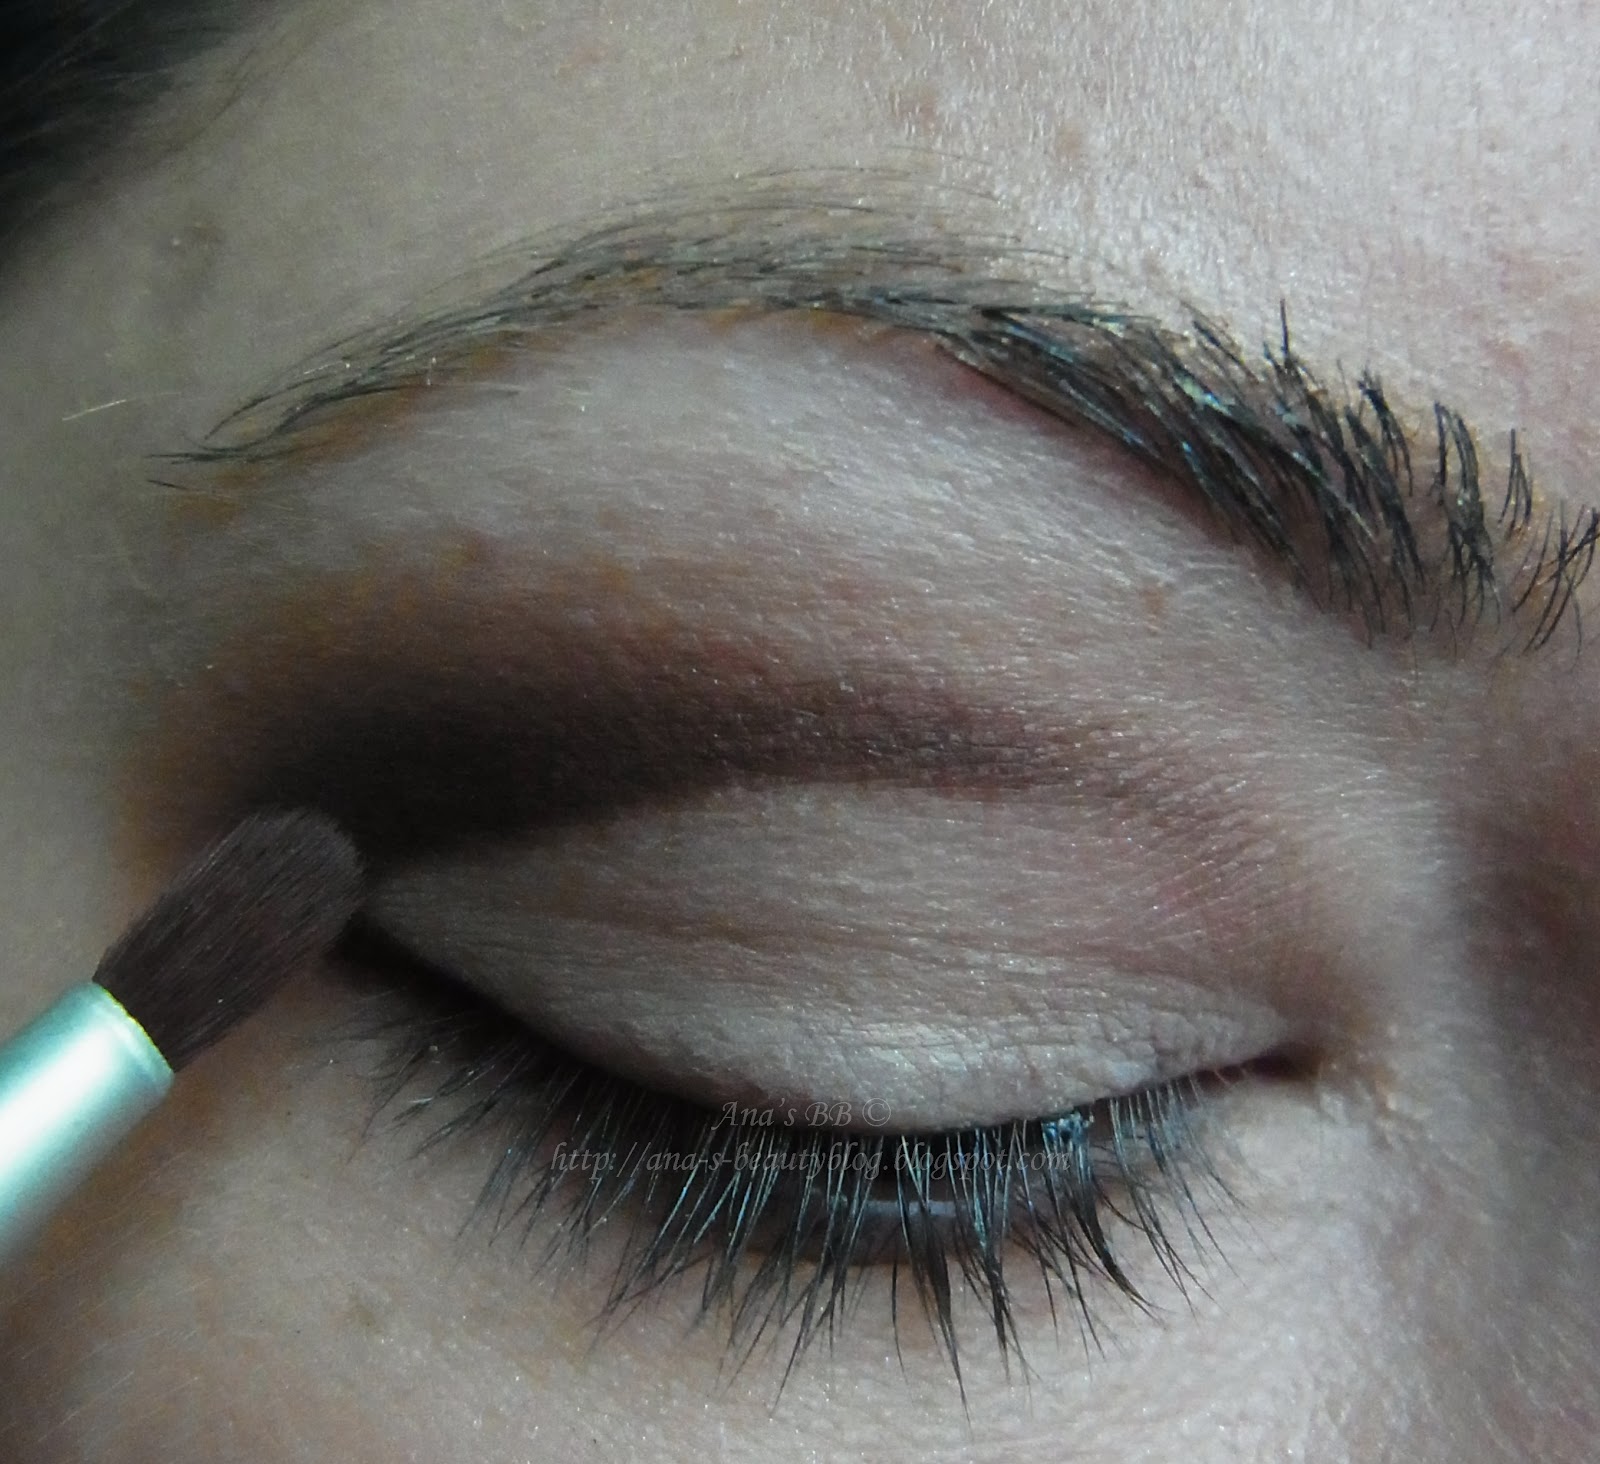
- Using a stiff and small brush, I smudge the eyeliner with small, short and upward movements. / Folosind o pensula mica si mai rigida, intind creionul prin miscari mici, scurte si ascendente.

- Using the same small brush and "Paper Bag" shade from Ultra Mattes Dark, I've set the line drawed with the eyeliner and I've smudged the eyeshadow using the same small and upward movements. / Folosindu-ma de aceeasi pensula mica si de nuanta Paper Bag din Ultra Mattes Dark, am fixat linia trasata cu ajutorul creionului si am intins fardul cu aceleasi miscari scurte si ascendente.


- With the help of a fluffy rounded blush, I've blended out Paper Bag. / Cu ajutorul unei pensule pufoase, rotunda, am blenduit Paper Bag.

- Using another fluffy brush, a flatter one this time, I've blended the brown eyeshadow with the "Flesh" shade from Dark. Then, for more color, I've reapplied Paper Bag as you can see in the picture bellow, with a very small fluffy brush. / Folosindu-ma de o alta pensula pufoasa, de aceasta data mai plata, am estompat fardul maro cu nuanta Flesh din Dark. Apoi, pentru mai multa intensitate, am aplicat din nou Paper Bag dupa cum vedeti in poza de mai jos , cu o pensula foarte mica si pufoasa.


- Under the archbrow and the inner quarter of the eyelid, I applied "Dune" from Dark. / Sub arcada si pe sfertul interior al pleoapei, am aplicat Dune din Dark.


- On the mobile lid I applied NYX Jumbo Eye Pencil Strawberry Milk and I smudged it using a flat brush. Then, using a flat, fluffy brush, I applied Floss from Ultra Mattes Brights. / Pe pleoapa mobila, pana la linia maro, am aplicat NYX Jumbo Eye Pencil Strawberry Milk si l-am intins cu o pensula plata (una care mi-a picat la indemana). Apoi, cu o pensula pufoasa plata am aplicat nuanta Floss din Ultra Mattes Brights.


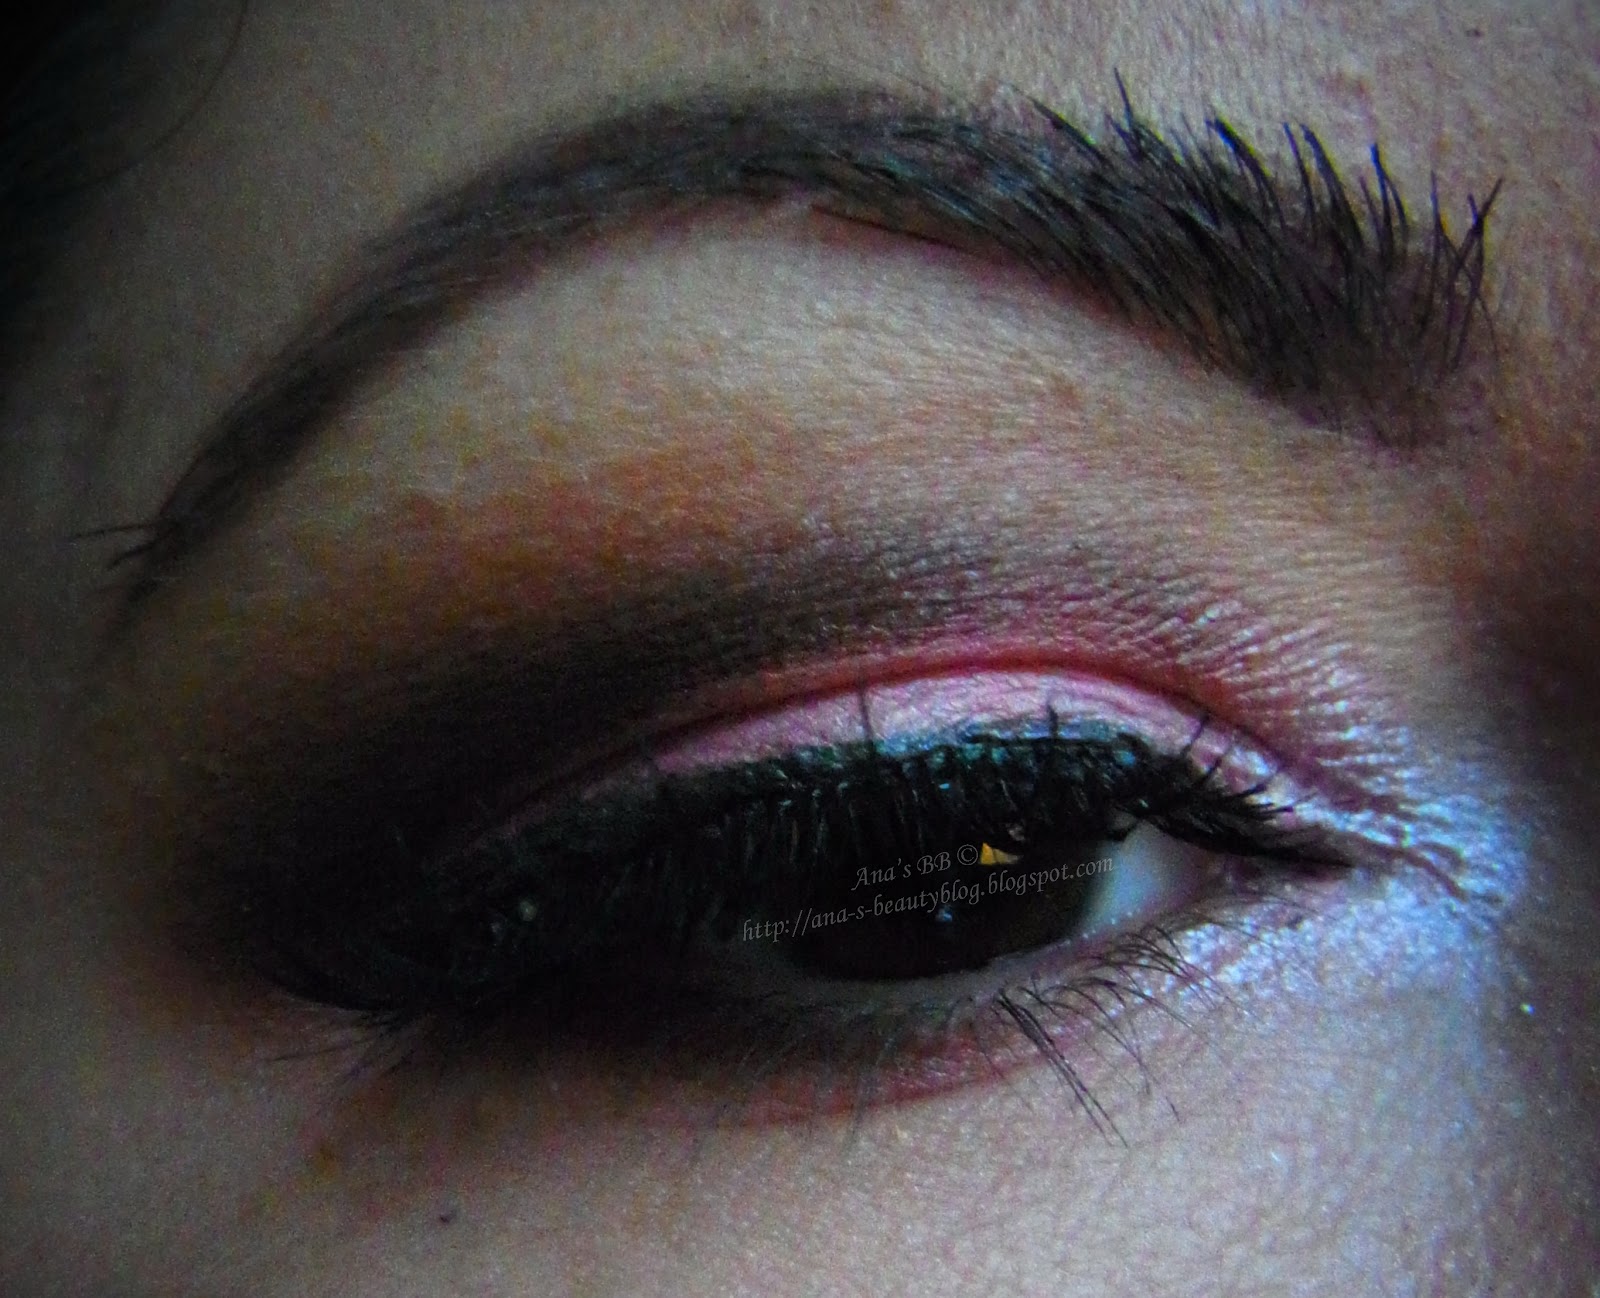
- In the inner corner of my eye I applied Wah Wah white from Supreme. On the lower lash line I used Paper Bag and Floss, I lined my eyes using a gel eyeliner from Essence (02 London Baby), I applied falsies and used mascara (I forgot to apply it on my lower lash line). The last step was contouring and filling my eyebrows, but I have another tutorial for that. / In coltul intern al ochiului am aplicat Wah Wah White din Supreme. Pe linia genelor de jos am folosit Paper Bag si Floss, mi-am liniat ochii cu ajutorul tusului gel de la Essence (02 London Baby), am aplicat gene false si apoi am folosit rimel (am uitat sa-l aplic si pe genele de jos). Ultimul pas a fost conturarea si umplerea sprancenelor, pentru care am un tutorial separat.


That’s it. I know it looks complicated, I thought that too
at first, but now I find it really easy and I like it . You just need to
practice, don’t be upset if you don’t get it right from the first time.
Remember, nobody was born already knowing everything.
I hope you like this tutorial and I hope I explained it right. Enjoy
the pics.
Sper sa va fie de folos tutorialul, sper ca am
explicat cat de cat bine si va urez spor la treaba. Va las cu pozele.


Products I used / Produse folosite:
Face:
MeMeMe Seventh Heaven Enriched Moisturising Facebase
Radiant Matt Finish Transparent Base
Rimmel Wake Me Up foundation - 103 True Ivory
NYX Concealer in a jar
Rimmel Match Perfection Ultra Creamy Compact Powder - 103 True Ivory
Radiant Matt Finish Transparent Base
Rimmel Wake Me Up foundation - 103 True Ivory
NYX Concealer in a jar
Rimmel Match Perfection Ultra Creamy Compact Powder - 103 True Ivory
Yves Rocher duo powder – contouring
Eyes:
ELF Eye Primer
NYX Jumbo Eye Pencil “605 Strawberry Milk” – mobile lid /
pleoapa mobila
P2 Perfect Look Kajal - 020 brown
Essence eyeliner gel – 02 London Baby
GOSH Provocateur Mascara
Red Cherry false eyelashes
Check out Laura's post to see how to match your nails with this makeup. Click HERE.
Nu uitati sa aruncati un ochi pe postarea Laurei pentru a vedea manichiura asortata :). Click AICI, va rog.
For any questions, requests
or/and critics, please don’t hesitate to contact me using the comment section
below, my email addresses (ana.s_beautyblog@yahoo.com / ana.s.beautyblog@gmail.com) or on Yahoo Messenger (ana.s_beautyblog@yahoo.com).
Pentru intrebari, propuneri si/sau critici, ma puteti contacta folosind sectiunea de comentarii, adresele de mail sau pe mess.
Pentru intrebari, propuneri si/sau critici, ma puteti contacta folosind sectiunea de comentarii, adresele de mail sau pe mess.
Kisses and always be beautiful
Va pup si fiti frumoase

0 comentarii:
Trimiteți un comentariu